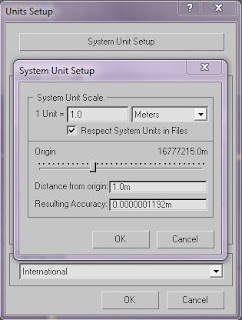
Before I begin modelling anything in 3DS MAX which I intend to import into Unity I go to Customize - Unit setup, then click the System Unit Set-up tab which brings me up with this menu.
Here is a basic model of two planes I created which I have applied a texture and a basic bump map.
Render
Now I open Unity and create a new project saving it to My Documents. Back in 3DX MAX I save my model to the the assets folder with in my Unity project folder. I also create a new folder with in the assets folder naming it textures and copy and paste my model texture and bump map to it.
Now when I go back to Unity my model and textures have been imported to my project tab.
Now I tick Collision Colliders and select Don't Import on the Animations Generation tab and click apply.
Now I can just drag and drop my model from the Projects tab to my scene. After that I click each plane in the Hierarchy tab. This give me the option to apply my textures to the model. I select an extra Shader option on the Shader tab and select Bumped_Diffuse. This applies another texture option below to put my bump map into. I select my textures in the 2D texture tabs and select the tiling to 3.0 on the X and Y axis of each texture, this is the result.
My model is now imported into Unity, now to add some lighting I go to GameObject - Create Other and create a Directional Light and a Point light, position them to bring out my textures and here is the final result of my 3DS MAX to Unity import test.


No comments:
Post a Comment